UV mapping by Wojtek Buddy Starak
UV mapping tutorial
"UV mapping " by Wojtek "Buddy" Starak
This tutorial is aimed for modellers who want to learn UV mapping. Before reading I suggest to take a look here and there.
This is what wikipedia says: „ UV mapping is a 3D modelling process of making a 2D map representing a 3D model. This map is associated with an image known as a texture. In contrast to "X", "Y" and "Z", which are the coordinates for the original 3D object in the modelling space, "U" and "V" are the coordinates of this transformed map of the surface. Then the image is back-transformed ("wrapped") onto the surface of the 3D object. For example, it is used to give an animated character a realistic looking face, but various other applications are possible.”
3Dtutorials.sk recommendation:
To maximise the realism of your models and textures we recommend to use high quality photo textures from the #1 texture website www.environment-textures.com
Which basiclly is:
There are several tools&techniques in 3dsmax to Unwrap Uvs of a model. These are UVW Map modifier and Unwrap UWV modifier (more complex/advanced, allows bigger UV map manipulation/editing than UVW Map). I will describe Unwrap UVWs
Unwrap UVW Modifier
Main panel:

Selection Parameters:
+ | - - adds to selection polygons sharing edge of current selection.
Ring - Selects parallel edges.
Loop - Selects junctions of even numbers of edges.
Ignore Backfacing - Ignores polygons which normal
is not faceing to camera when selecting. (their back side is faceing camera)
Parameters:
Edit – Look lower.
Reset UVWs - Resets UVW coordinates to their state before Unwrap UVWs was applied.
Save&Load - Not hard to guess.
Map channel - Selects which UV map channel will be edited (model can have up to 99 (uv) map channels with diffrent coordinates).
Edit UVWs Window & Pelt Mapping
Here’s place where most of the UV job gets done. Here’s quick reference for Mapping modes.
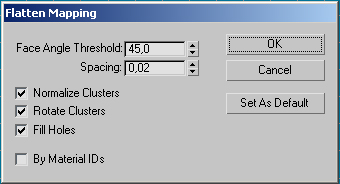
Flatten Mapping – Picks selected polygons and spread them along UV map region using parameters in the pop up.
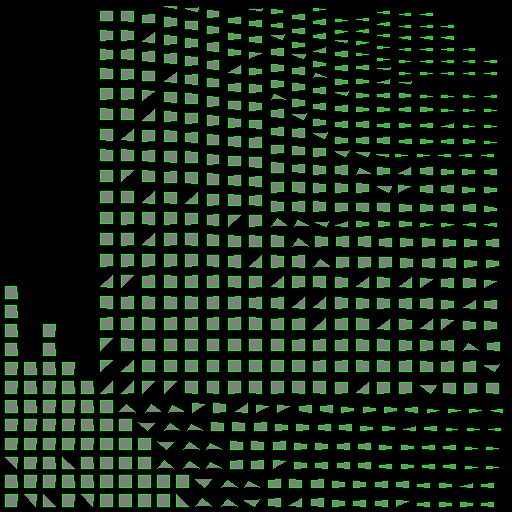
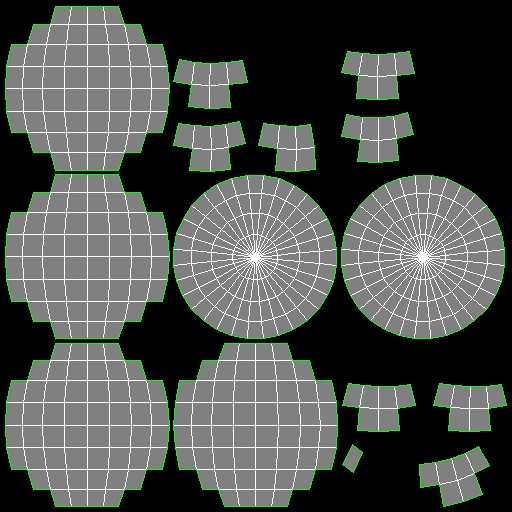
Face Angle Threshold – Simmilar to Autosmooth in SG, but this time it’s to determine when the clusters of polygons should split (it picks one polygon then checks angle between them, if it matches Threshold, it picks another etc). To clear things out, two pics.
Sphere Uvs Flattened with Face Angle Threshold set to 0.
Sphere Uvs Flattened with Face Angle Threshold set to 45.
Continue this tutorial click here.


